Excel
The VDP Office Add-In enables you to retrieve data via Virtual Data Platform and interact with it in Excel. Using the Add-In, you can work with your various Virtual Datasets directly in Excel by simply using a custom Excel function. Additionally, a Wizard supports you in configuring your requests and selecting your parameters. The VDP Add-In can be used in Excel Desktop as well as in Office online.
Get started
For how to install the Add-In, please refer to the get started section.
To load the Add-In go to tab 'Insert' and select 'My Add-Ins' in the Ribbon.
Selection to insert Add-In.
In the 'Office Add-Ins' dialog select the 'ADMIN MANAGED' section.
Section for Admin Managed Add-Ins.
You may not see the VDP Add-In yet, but a message, that there are no Add-Ins currently available. This will disappear after the next step.
Click on 'Refresh' in the upper right corner.
Refresh Admin Managed Add-Ins.
Now you can select the VDP Wizard
Refreshed Add-Ins.
and click 'Add' to load the Add-In.
Load Add-In.
If the Add-In was loaded successfully, you can see an additional tab in the Ribbon.
Ribbon with Add-In.
Now you can start to use the VDP Add-In. Therefore, click 'Open Wizard' on the upper left of the Ribbon to open the Wizard in the taskpane. After clicking the button in the taskpane to connect to VDP, you can start exploring all the Functions and Models available for you.
The opening dialog window is used to connect you to the platform and may ask you to enter your credentials. Enter the username and password of the account, you are using to connect to VDP.
The next section will introduce you to the main element of the Add-In, the Excel formula with which you can retrieve the data from the platform.
Formula
The formula to retrieve data from Virtual Data Platform is the following:
=VDP.GetData("Category", "Function", "param1=value1", "param2=value2")
Formula example.
In general, there are 5 types of parameters, which can be used:
- Single value: single strings, dates or numbers
- Table: Excel range
- Range: an interval
- List: list of values (semicolon separated)
- Selection: list of values including ranges
Each date and time is fundamentally always converted into a DateTime format and, in doing so, consistently operates from the UTC timezone, even within the applications.
Following operators can be used (if the configuration of the respective parameter allows it):
>=: GreaterOrEqual>: GreaterThan<=: LessOrEqual<: LessThan- starting
!: Exclude - contains
-: Between
In general, list and selection in combination with the operators can be used in the simple syntax as used in the basic formula:
=VDP.GetData("category", "function", "param1=value1;!value2;<value3", "param2=value2")
But since there is a multitude of possibilities for range, selection and list to be combined with operators, there are additional functions for these types:
=VDP.List("parametername", "value1", "value2")

=VDP.Selection("parametername", "value1", "value2")

=VDP.Range("parametername", "lower_interval_limit", "upper_interval_limit")
Formulas for list, selection and range.
In case you are using the Wizard for creating your formula, you are able to select whether you want to use the simplified syntax shown in Figure 8 or the more advanced one in Figure 9.
Cell references can be used within all formulas and must be used when having a parameter of type table, since a range in Excel is expected. In this case, there is help provided by the Wizard to select your input parameters, which will be shown in the next section.
All data returned by the formula is added as named range to your workbook. This allows you to work with the results in a dynamic way, since named ranges can be directly used in cross-references and e. g. diagrams. In case the dimension of your result changes, the size of the named range adjusts automatically to the new one.
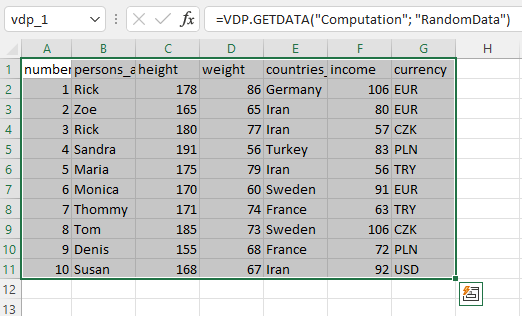
Named Range.
The next section will guide you through the key elements of the Wizard and will show you how to configure and customize your requests.
Wizard
The taskpane Wizard is the main element of the Add-In, which allows you to navigate through all Models and Functions available for you and lets you configure your requests as you require. To open the Wizard, click 'Open Wizard' on the upper left of the Ribbon.
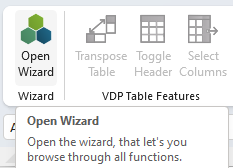
Open Wizard.
To connect to the platform, you can either click the 'Login' button in the Ribbon bar or the button in the taskpane Wizard and, if necessary, follow the steps shown in the dialog. The main view of the Wizard displays all Functions and Models sorted by Category.
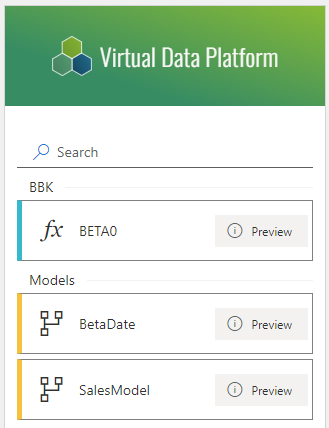
Main View Wizard.
Additionally, you can search for Category, Functions and Models using the search bar.
After selecting a Model or Function, the Formula Wizard is displayed, which supports you in setting your parameters correctly and, if needed, lets you set some additional options for the request. The upper part contains some descriptive information about the Function or Model and indicates the maturity of it, so if it is still in preview or already deprecated.
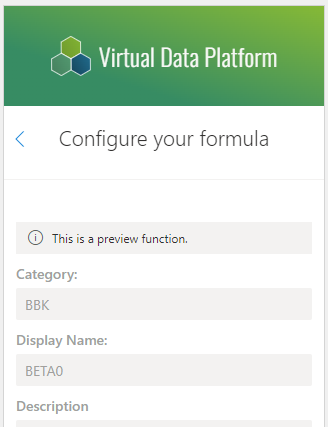
Formula Wizard.
In the lower area you can see all parameters which are existing for the selected Function as well as the option section.
Parameter Selection.
In case the Function or Model allows unknown parameters, these can not be added using the Wizard and must be entered manually in the formula.
If you click on a parameter item, you can see an input field, in which you can insert the parameter values. Depending on the parameter type and your input, suggestions are displayed to make sure, that operators and value types are reflected correctly.
Parameter Item.
Once a parameter is selected pressing ENTER, it is shown in the Tag Pane. The colors and icons indicate, if an operator is included and if the value of the tag should be in- or excluded. The tags can be deleted or adjusted when clicked.
Under 'Advanced options' you can select whether you want to insert the formula using the more advanced syntax or with the simplified one.
Simplified Formula Syntax.
Advanced Formula Syntax.
It is recommended to prefer the advanced syntax, since it is more suitable for complex parameter combinations and special cases.
If the Function has children, these can also be viewed and adjusted in the 'Children' area.
Once all parameters are set, they can be transferred to the selected cell using the button at the bottom of the Formula Wizard.
Formula Transfer.
The formula for an existing request can be adjusted by clicking in the range of the data, since this will open up again the Formula Wizard with the currently selected parameters.
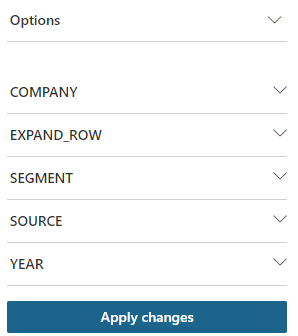
In addition to defining parameters for the request, it is possible to set options, such as transposing the resulting data, setting a row limit of the results or selecting columns from the output.
Options.
Values entered or selections made in this area are treated like the other parameters and will be transferred to the formula as well once the button is clicked.
Ribbon
The Ribbon provides some general functionalities as well as shortcuts to adjust your formulas.

Ribbon with Add-In.
If you want to change formulas or input parameters of formulas without refreshing the related function, you can disable the refresh of all VDP functions of the workbook. This can be set using the 'Enable Refresh' and 'Disable Refresh' buttons in the Ribobn.
About Dialog.
To get some more general information like the current version of the Add-In you're using, a link to our website or to this manual, you can open the 'About Dialog' in the 'Infos' section.
Enable and Disable Connection.
In addition, if your current selection in the worksheet is a named range generated by the Add-In, you can use the 'Table Features' to directly insert options in your formula e. g. for transposing the data or you will be directed to the according area of the Wizard to adjust the formula.
Table Features.
Problem Handling
In case there are problems, for example when the AddIn was updated by a release and is not available anymore, clearing the cache could help. It can be done by opening a command line and insert the command:
rmdir /s /q %LOCALAPPDATA%\Microsoft\Office\16.0\Wef\